Hello hello,
A first DIY jewelry session?! Well yessss :-) It was by chance that I discovered a photo on the Sezanettes DIY Facebook group (which I highly recommend) that I thought to myself "but it's sooooo beautiful, I want the same one!!"

So here's a little step-by-step tutorial to help you create this little marvel with your own two hands <3
Shopping list (found at Perles&Co):
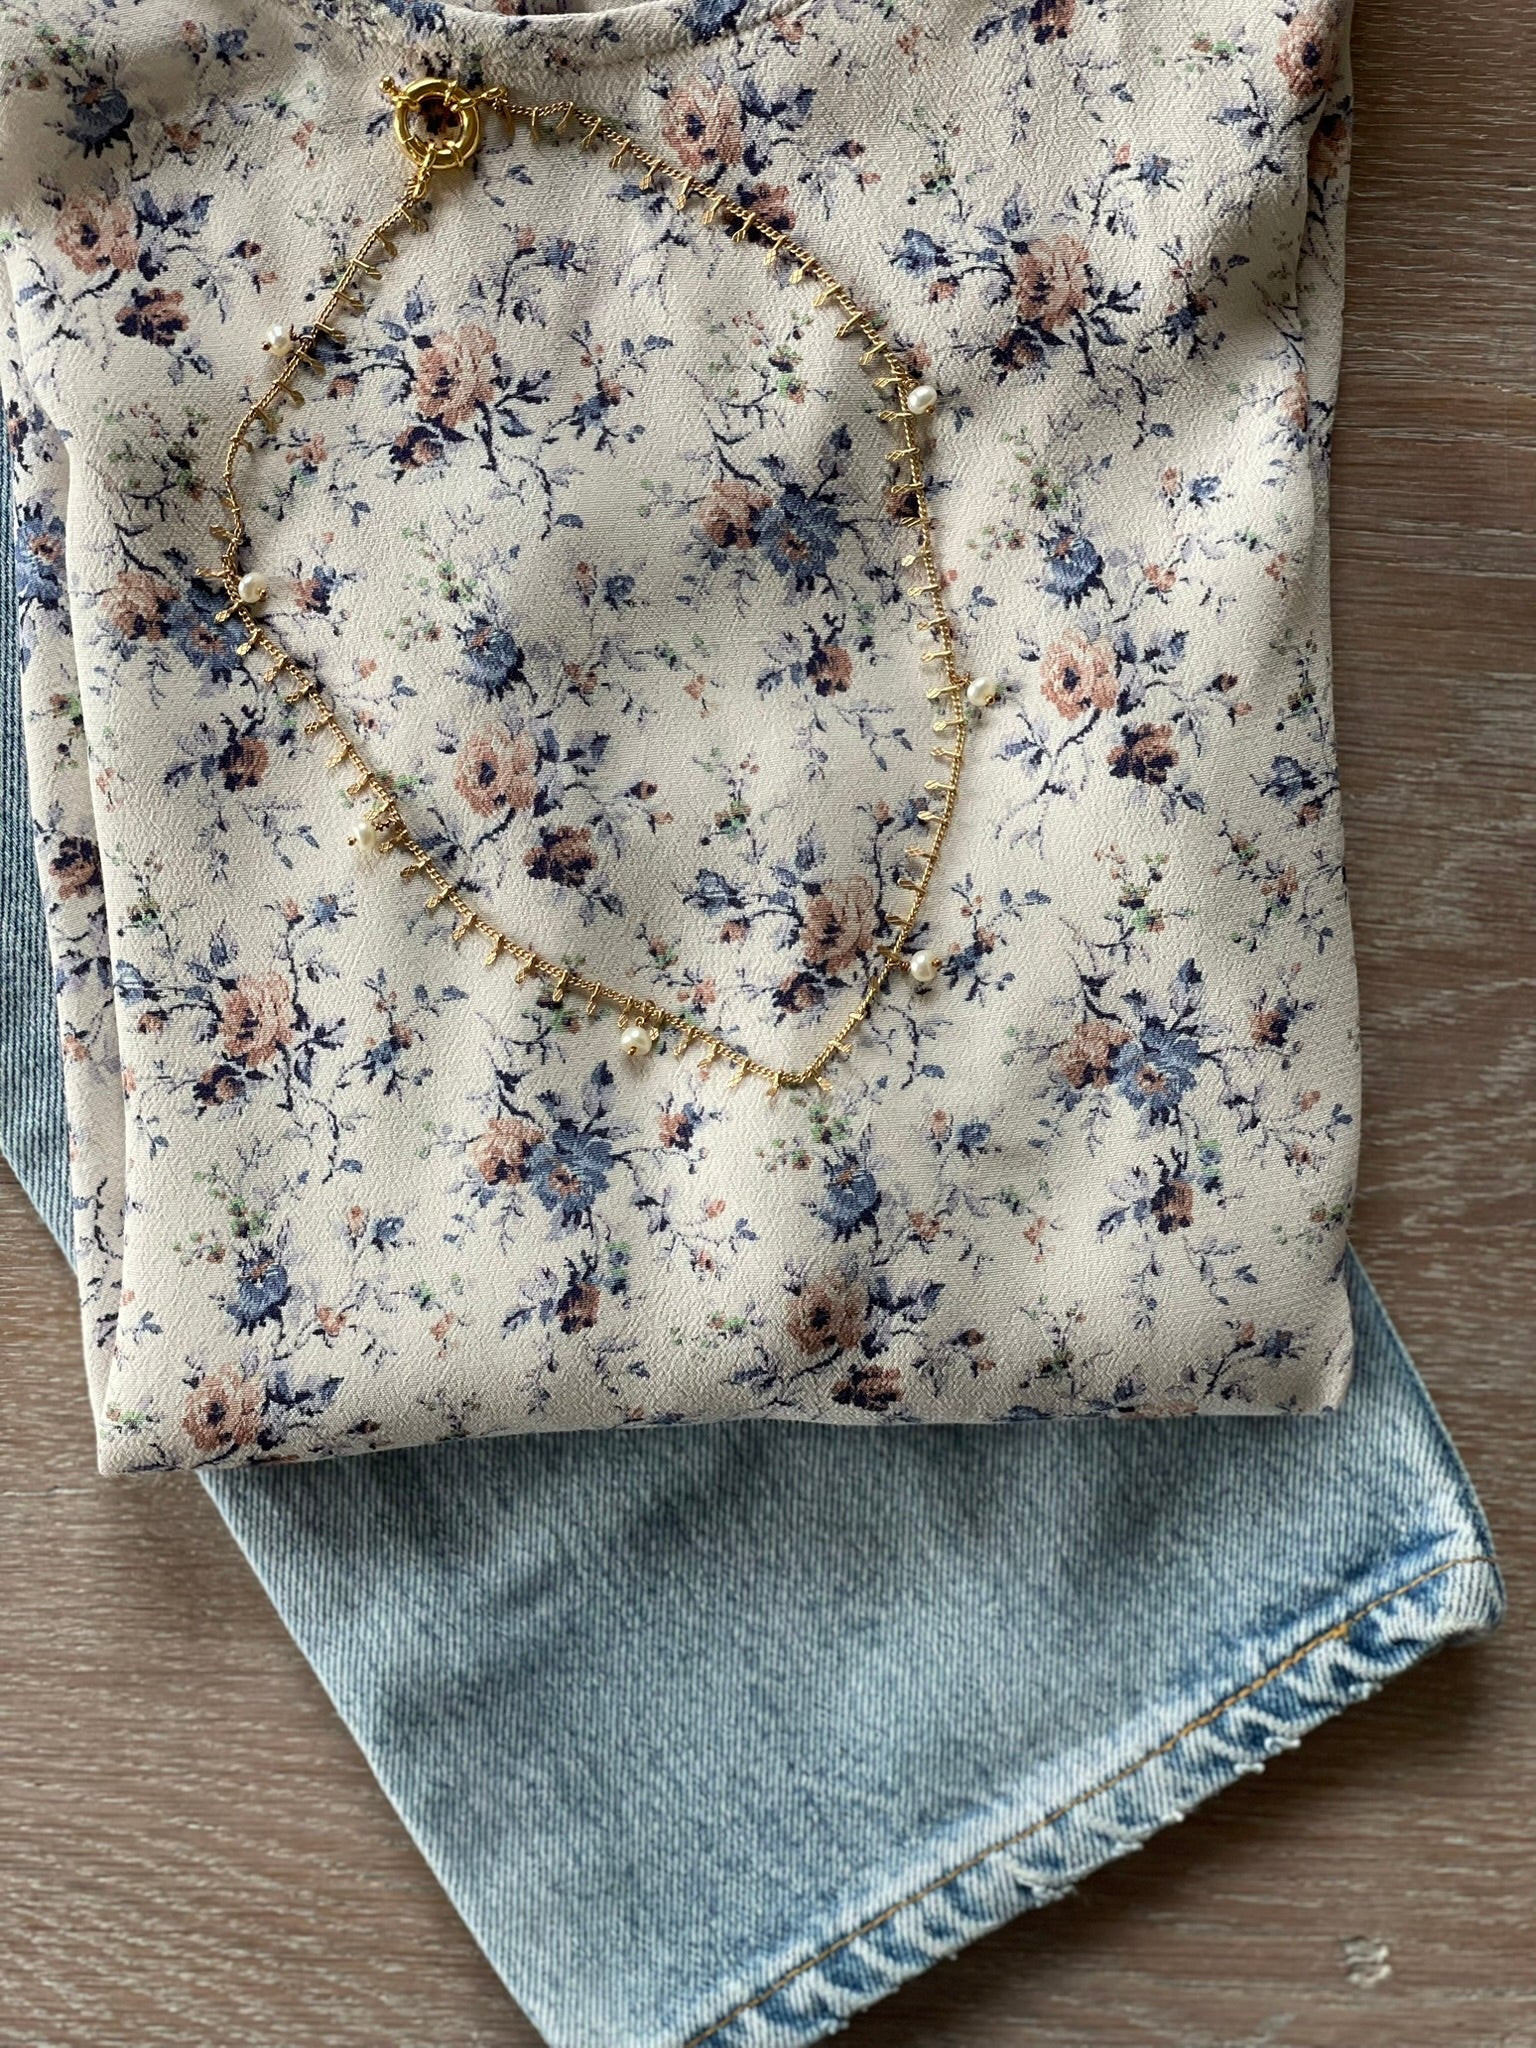
- For the chain: Fancy curb chain with 6mm bars - Satin gold x50cm (note, I would recommend a bright gold to better match the clasp)
- Small nails for adding beads: Ball head nails 26 x 0.5 mm, gold plated x50
- The pearls: Freshwater pearls, round, flattened, 6x4 mm, white x20
- The clasp: 15mm gold-plated buoy clasp x1
- Small rings to attach the clasp and/or tassels: 10 open rings 4x0.7 mm in Gold filled (also pay attention to the size, it is possible to use thinner ones depending on the desired effect)
Tools needed: Flat pliers, round-nose pliers (you can find a set of 3 pliers like this one for example: Set of 3 pliers in a Perles & Co Blue carrying case x1)

So, you have everything? Let's go!!
1/ Cut the chain using the wire cutters to the desired length (I chose 42cm)
2/ Attach the clasp using 2 small gold rings at each end of the necklace (my rings were too big so I had to attach it between 2 curb links but for a more aesthetic look I recommend thinner rings attached directly to the links of the chain)
3/ Locate the center of the chain where we will attach the first "pendant"
4/ Prepare the first tassel with a bead by threading a bead onto a nail, then form a loop with the right side by wrapping it around a round-nose plier.
Now you have 2 options:
- Either insert the tassel directly in the desired location and secure it by wrapping the nail around the chain (which is what I did)
- Alternatively (and probably more aesthetically pleasing), loop the end of the nail around the loop below the earring to create a pendant-like effect. Then attach the tassel using an open jump ring.
5/ Attach the tassels at regular intervals (I placed 7 in total), spaced 7 small chain links apart, but this really depends on the designer's wishes!
6/ Once the 7 tassels are attached, ta-da! You are now the proud owner of a Charlotte Hack Sezane necklace ;-)


I hope this is clear, this is my first jewelry tutorial, I'm counting on your understanding and feel free to tell me in the comments if you need more details so I can add them for everyone :-)
But honestly, I'm delighted with the final result!!
The beads can be replaced with colored beads, of course.
I wish you a very beautiful creation and don't hesitate to share your necklace on the Facebook group, it's always a pleasure to discover the different versions!
The Atelier 27 team
0 comments